Soledad Documentation
Set up WordPress menu locations, category mega menus, custom mega menus, menu columns, and menu icons.
36 articles across 15 sections.
Menu & Mega Menu Builder
Soledad supports 3 locations for custom WordPress menu:
- Primary Menu: Check this image
- Topbar Menu: Check this image
- Footer Menu: Check this image
For menu setup, navigate to the Appearance > Menus page. Enter a name for your menu and add links to the menu by using the options given on the left sidebar. You can manage your menus using the drag and drop functionality. After setting up your menu, select the menu you just created from the theme locations drop-down box, scroll down to bottom check to "Primary Menu" or "TopBar Menu" or "Footer Menu" ( based on where you want the menu displays ) and hit the "Save" button.
TIP: Read more about WordPress Menus: WordPress Menu User Guide
How to set up a category mega menu
Check this video tutorial to know how to create a category mega menu:
Important Note: The menu item that you have selected to display category mega menu need to be top level of your menu and this menu item doesn't have any child menu items.
Unlimited Mega Menu Builder
From version 8.0.6 - the theme supports you to build multiple mega menus that fit with your purpose. That's a great feature from Soledad. You can check video tutorial below to know how to use it:
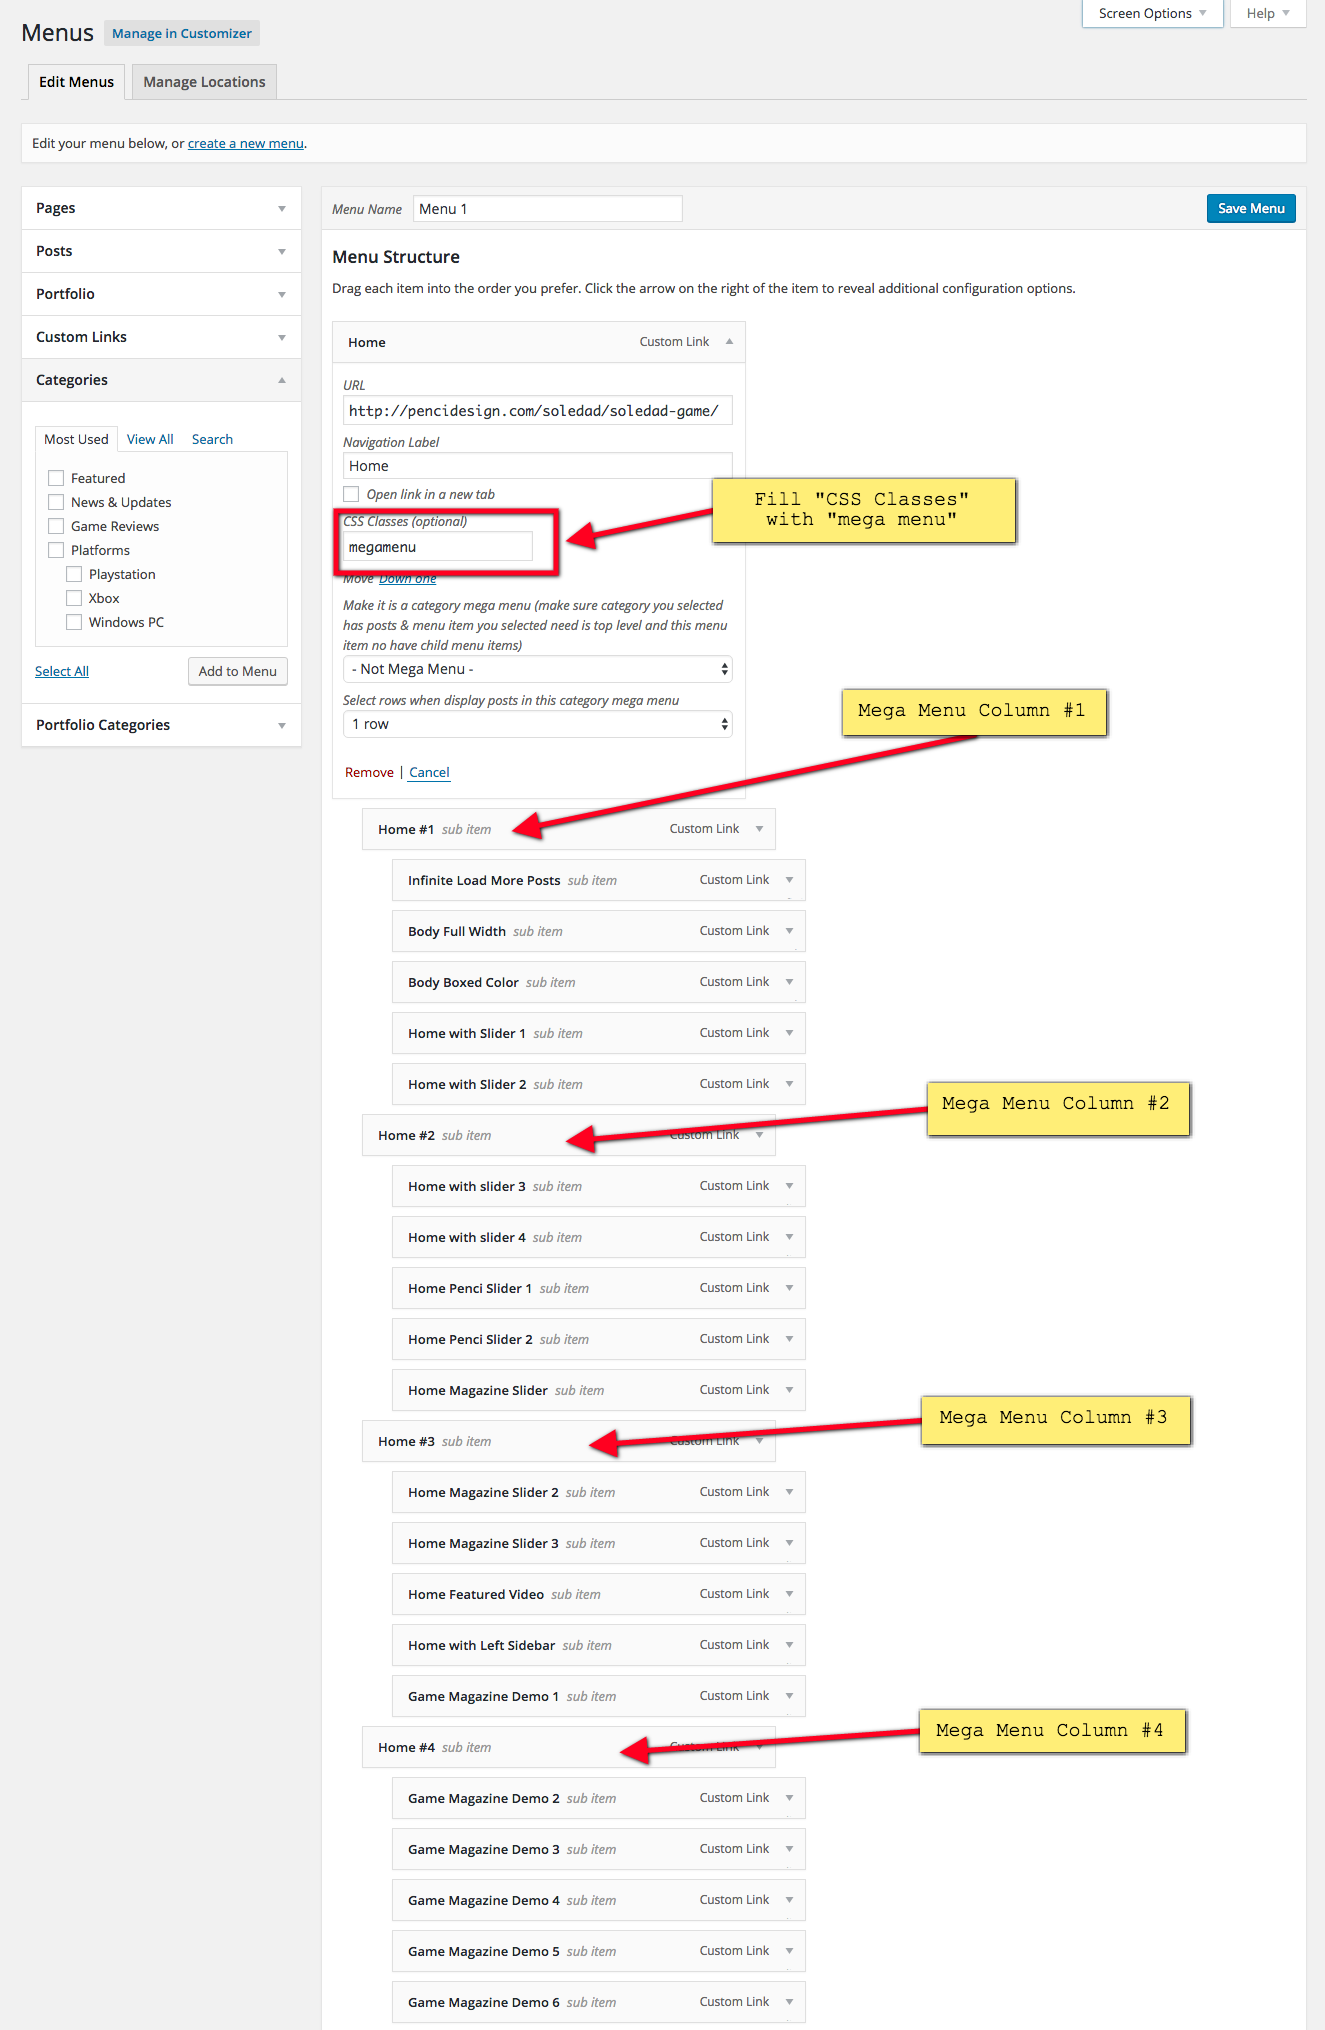
How to set up simple mega menu columns like this image
Check the images below to know how to do that:
Click the image to view a larger version.
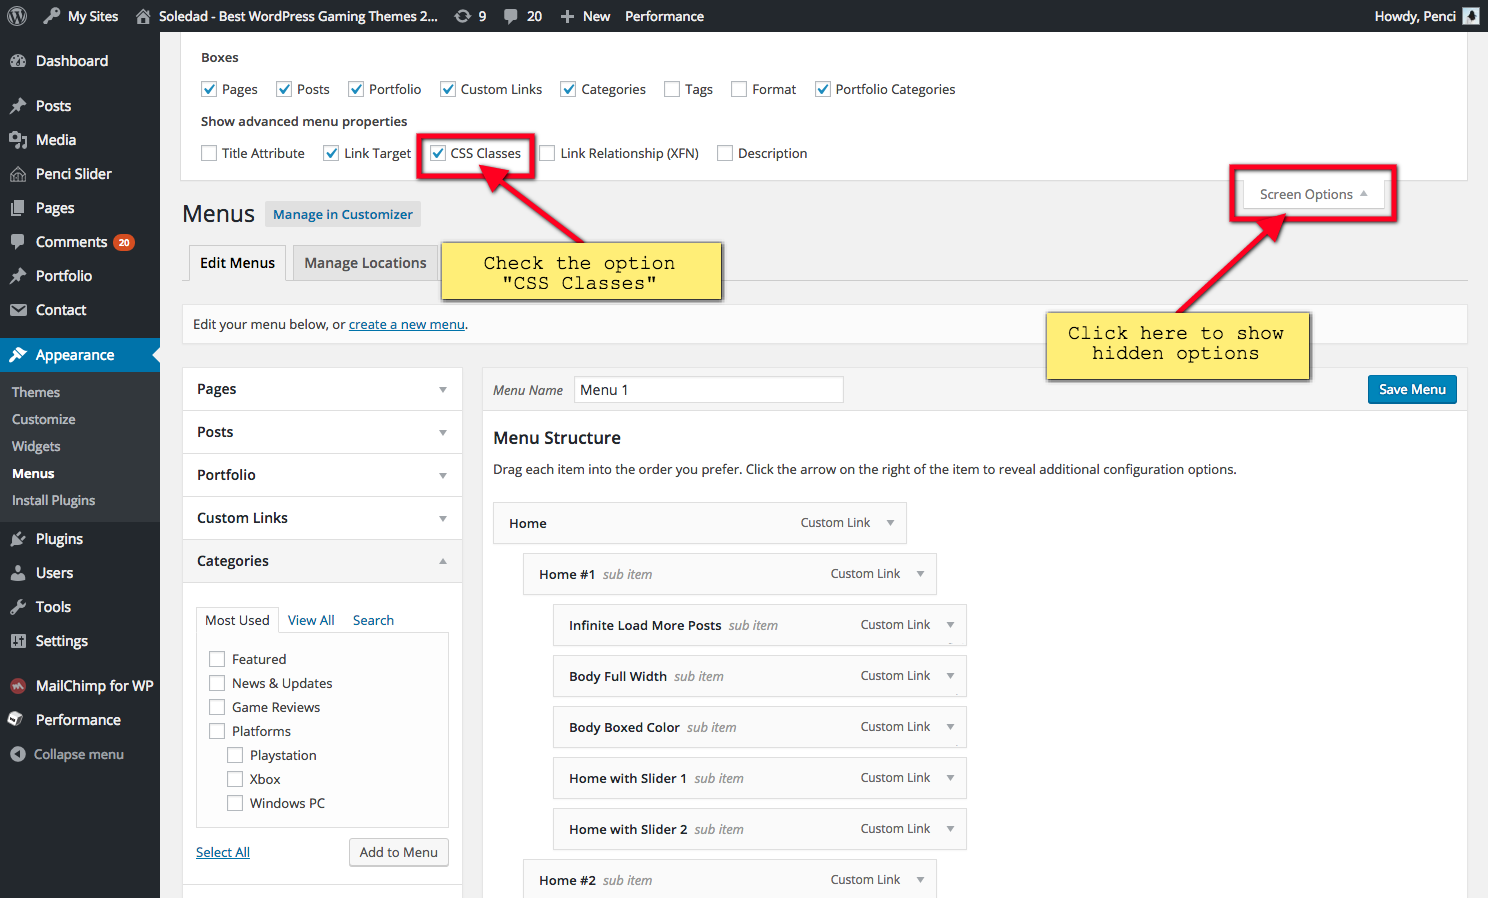
Click the image to view a larger version.
How to add icons to your menu
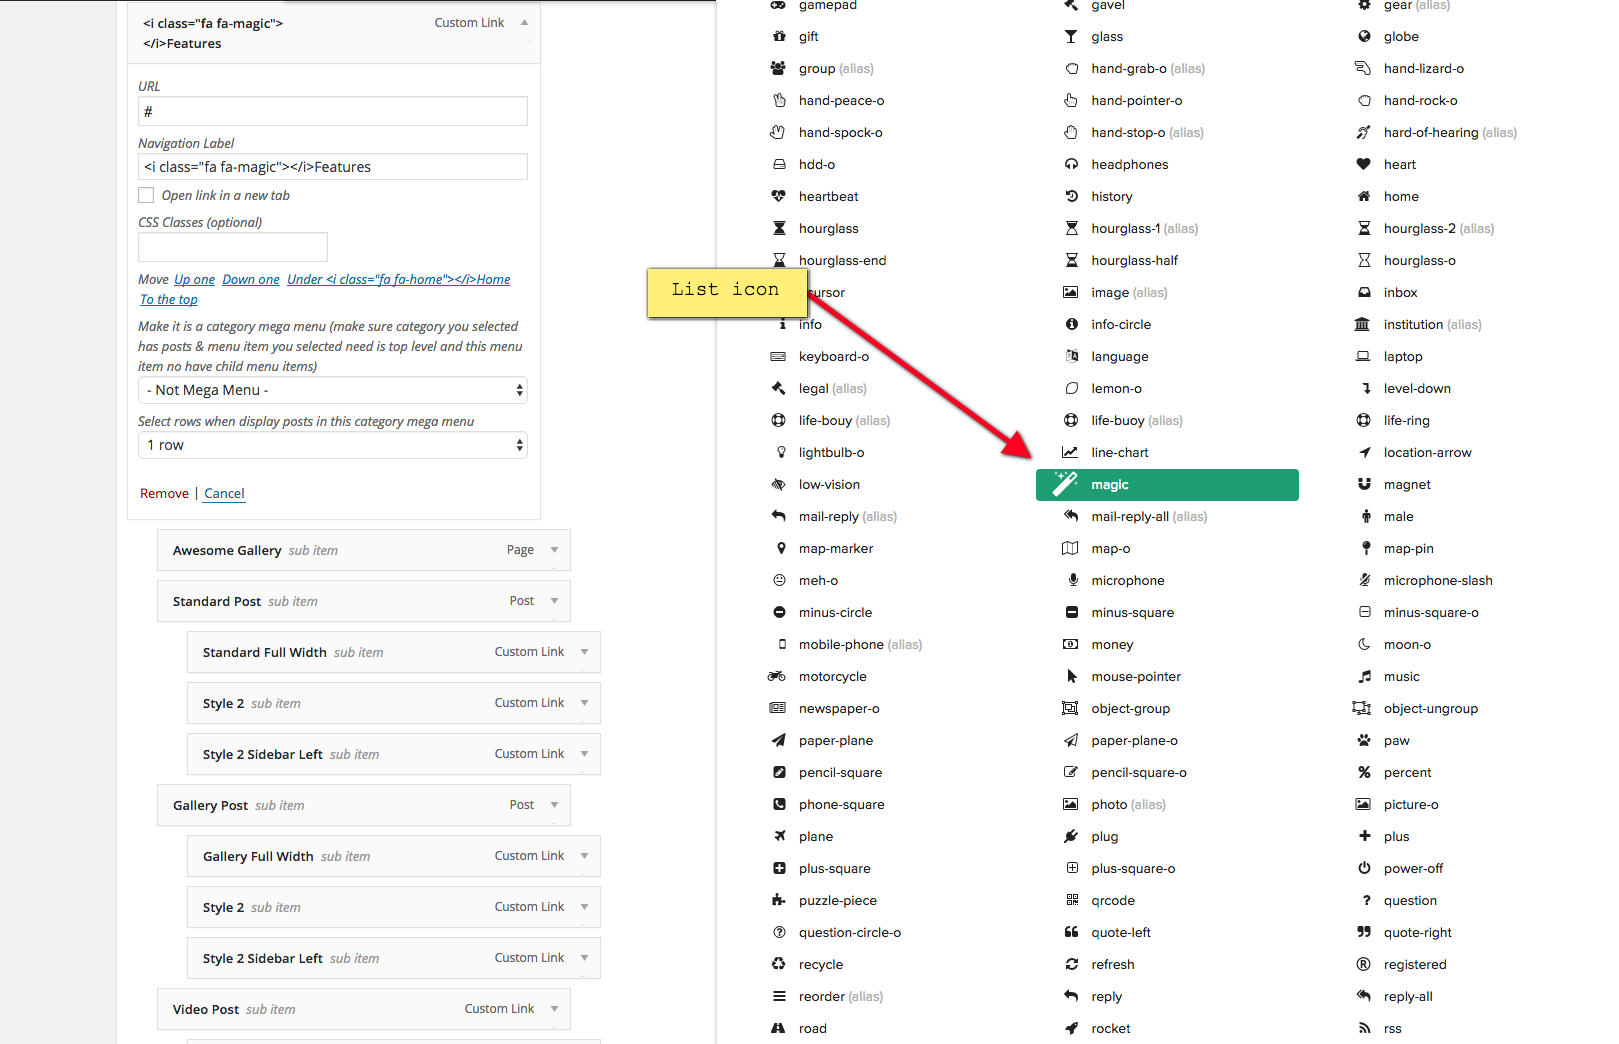
- See list icons here
- Go to Dashboard > Appearance > Menu
and fill "Navigation Label" of your menu with this code:
<i class="fa fa-home"></i> - Change the text "home" in the above code to icon name you want to display
For example: if you want to add the magic icon to your menu, change the code to <i class="fa fa-magic"></i>.
Click the image to view a larger version.